
Since Speak Freely can be overwhelming for the first time user, this Quick Start Guide will guide you through setting up Speak Freely and making your first Internet telephone call in just 4 easy steps!
Once you have started Speak Freely, click on the Options menu as shown below:
Make sure that only GSM Compression is checked. If anything else on the Options menu is checked, uncheck it. Then, choose Voice Activation from the Options menu and make sure it is set to None. Jitter Compensation should be set to None as well. Finally, verify Transmission Protocol is set to Speak Freely and Robust Transmission to Normal.
Under the Phonebook menu, choose Edit Listing...:
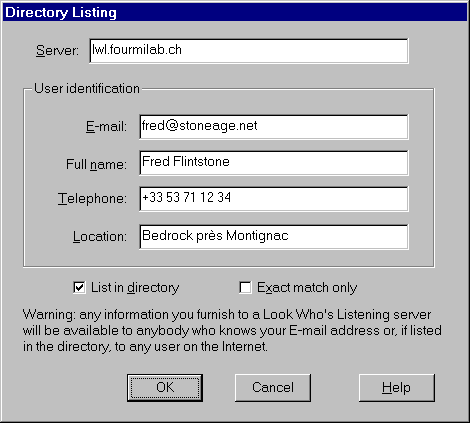
Fill in your personal contact info, including your name and email address. You may leave your phone number blank for privacy purposes. If you are concerned about your email address being published, you can always add something like "-X" to your address. For example, if your email address is jsmith@company.com, you might enter "jsmith-X@company.com". Just be sure the people who you would like to receive calls from know what you entered.
Make sure Server is set to "lwl.fourmilab.ch" unless someone has provided you with a different Look Who's Listening server name. Make sure List in directory is checked. If you don't want anyone else to be able to see your information unless they search for your exact email address, check Exact match only also. Click OK when finished.
Under the Connection menu, choose New...:
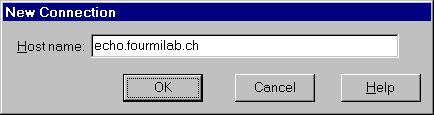
Type "echo.fourmilab.ch" in the connection box and click OK.
You will see a new connection window appear, and about 10 seconds later, you will see your name and email address appear as well. Move your mouse pointer over the connection window, and it will turn into a telephone. This is Speak Freely's indication that it is not sending any audio to the other person right now.
Now, hold down the mouse button (with the pointer still inside the connection window). When you see the phone change to an ear, begin speaking into your microphone for 3 or 4 seconds, and let go of the button. If all is working properly, you will hear your voice echoed back to you in about 10 seconds. If you do not hear anything at all after about 20 seconds, your microphone's record volume is probably set too low or muted. See the Frequently Asked Questions section if you have problems.
Close the connection to the echo server by clicking the X in the upper right corner of the connection window, or choose the Connection menu and select Close.
Under the Phonebook menu, choose Search...:
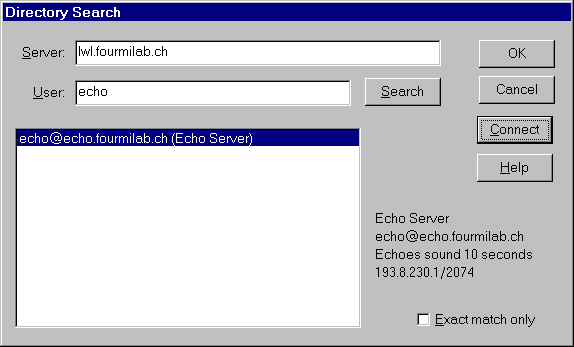
There are three ways to make a call. The first is to type your friend's email address or name in the User line and click the Search button. If the person is online, their name will appear in the results window under the User box. To connect to them, simply highlight their name, and click on the Connect button.
The second way to make a call is to use ICQ to establish the call. Do this by clicking on the desired person's name in ICQ, point to Internet Telephony/Games, and select Speak Freely. Then, enter a reason for the call, and wait for them to connect.
The third way to connect is to choose New... under the Connection menu and type your friend's IP address or hostname (e.g. dialup-138.company.com and NOT www.company.com) into the box and click OK. This method is usually for advanced users and requires prior knowledge of the called party's IP address since most Internet Service Providers assign each user a different IP address each time they connect to the Internet. The other person will need to find out their current IP address ahead of time, which they can do in Speak Freely by choosing the Help menu and selecting About Speak Freely.
Once you have established the call, you can talk to the other person the same way you tested with the echo server. Simply point to the connection window and hold down the mouse button when you want to talk, and let go when you want to listen. This method of talking is the same as HAM radio where one person speaks and says "Over!" to let the other person know it is safe to talk. This is the best for establishing a new call to someone who might not have a full duplex sound card. This can also be determined by choosing the Help menu and selecting About Speak Freely.
Congratulations! You are now capable of making free long distance calls over the Internet! After you are comfortable with the flow of the conversation, you can experiment with the other options such as Voice Activation. Generally, the best way to make a call function just like a regular telephone is to use Voice Activation on a full duplex call. To go into full duplex mode, both parties double click their mice in the connection window to force constant transmission with the ear icon showing. See the Voice Activation section for help in setting the optimal volume level. As with the echo server, when you are ready to end the call, just click the X in the connection window to disconnect. Have fun!